On your dashboard follow these steps to efficiently create a quiz:
1. Navigate to the quiz section by selecting it from the menu situated on the left-hand side of the screen.

2. Upon clicking this option, you will be directed to the quiz page.
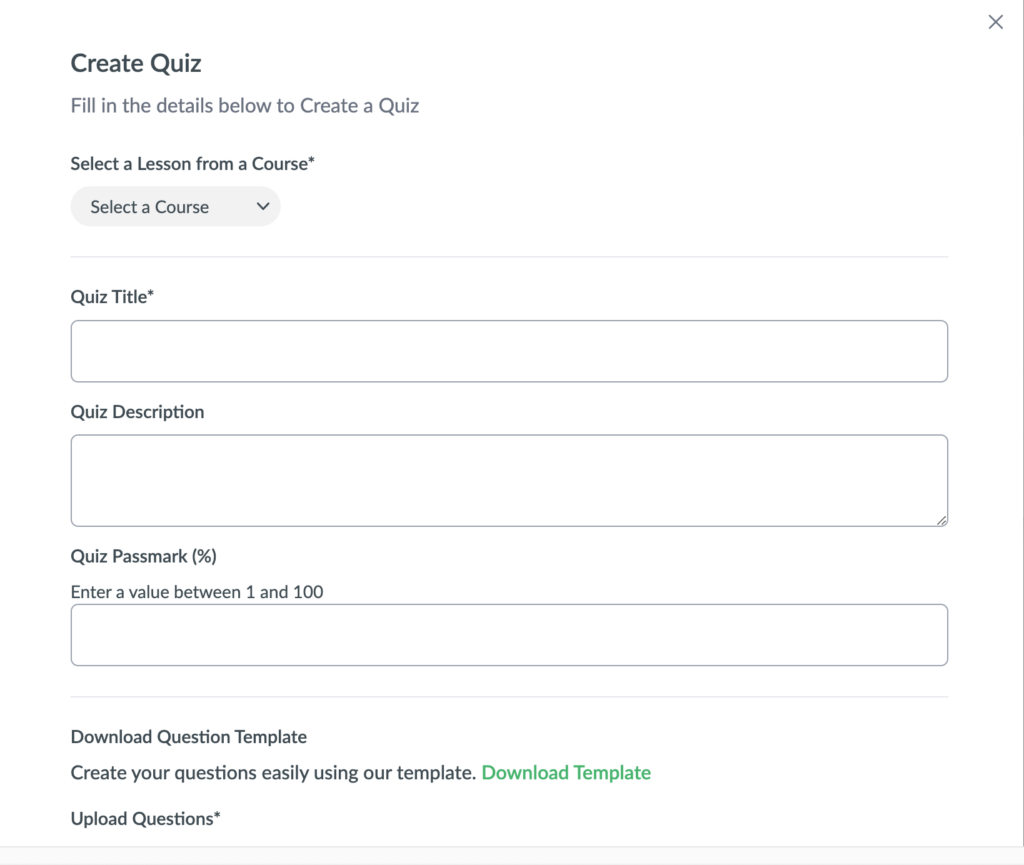
3. Click on the “Create Quiz” button positioned on the right-hand side of the page.

3. This action will trigger a pop-up window displaying various fields that require completion. These fields include: selecting the course, entering the quiz title, providing a quiz description, setting the quiz pass mark, downloading the question template, and uploading the question template.

3. Begin by selecting the desired course to which you intend to add the quiz. Subsequently, the system will prompt you to select the specific lesson associated with that course.

4. Proceed to fill in the remaining fields: quiz title, quiz description, and quiz pass mark.
5. Then proceed to download the question template. It will be provided to you in the form of an Excel document.

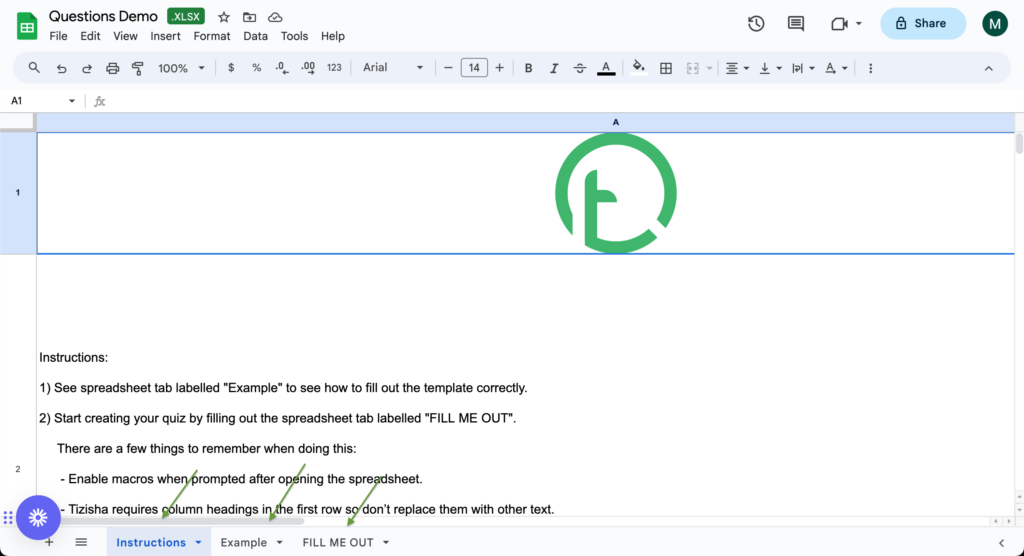
5. Within this Excel/google sheet document, at the bottom, you will see three distinct sections: instructions, example, and fill me out.

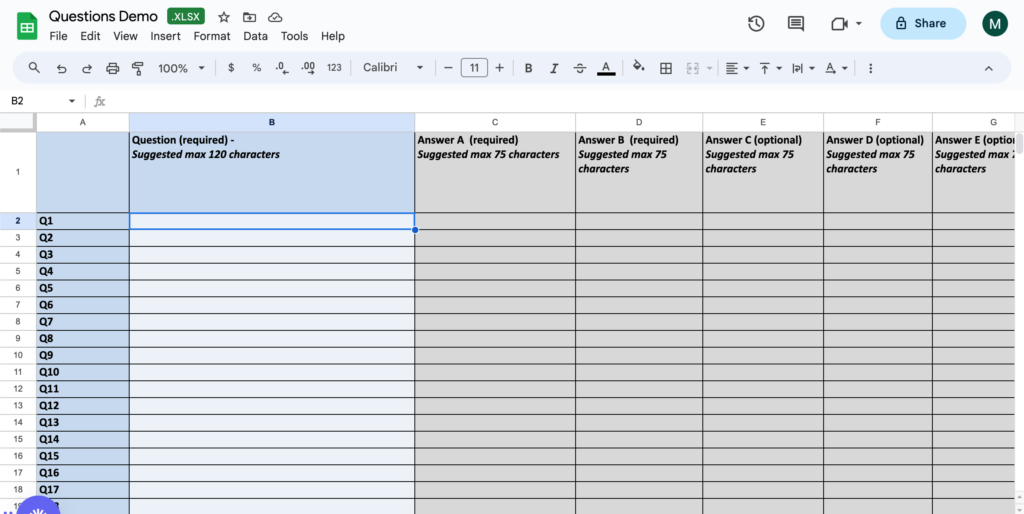
6. Go to the “fill me out” section, where you should enter your questions, multiple-choice answers, the correct answer, and any supplementary follow-up questions as required.

7.After successfully filling out the template, return to the Tizisha platform and proceed to upload it.

Please note: Do not make any alterations to the instructions and example sections; limit your modifications to the “fill me out” section. Additionally, ensure that no rows or columns are deleted during this process.
Pro Tip: If you don’t have excel on your laptop you can still download the excel document and open it with google sheet. Here is a tutorial on how to do it
Here is a video walk-through on how to do it:

